Machine Learning: Predict Using a Neural Network Regression Model
This tutorial demonstrates how to perform predictions using a multilayer perceptron trained for regression using SciKit-Learn.
Pre-Requisites
In order to perform this tutorial, the ML Training tutorial must be completed.
1. Acquire Data
The data we use in this tutorial is taken from a recent model of small molecule adsorption to transition metal nanoparticles. Specifically, we use DFT-calculated values for the adsorption energy of ·CH3, CO, and ·OH radicals to Ag, Au, and Cu nanoparticles ranging in size from 55 to 172 atoms.
This File contains the data we will use in this tutorial for predictions. A sample of the first 5 lines in the file can be found below:
| CE_Local_eV | ChemPot_eV | MADS_eV |
|---|---|---|
| -2.38 | -4.96 | -2.10 |
| -3.35 | -4.96 | -2.10 |
| -4.81 | -4.96 | -2.10 |
| -4.60 | -4.96 | -2.10 |
2. Upload the Data
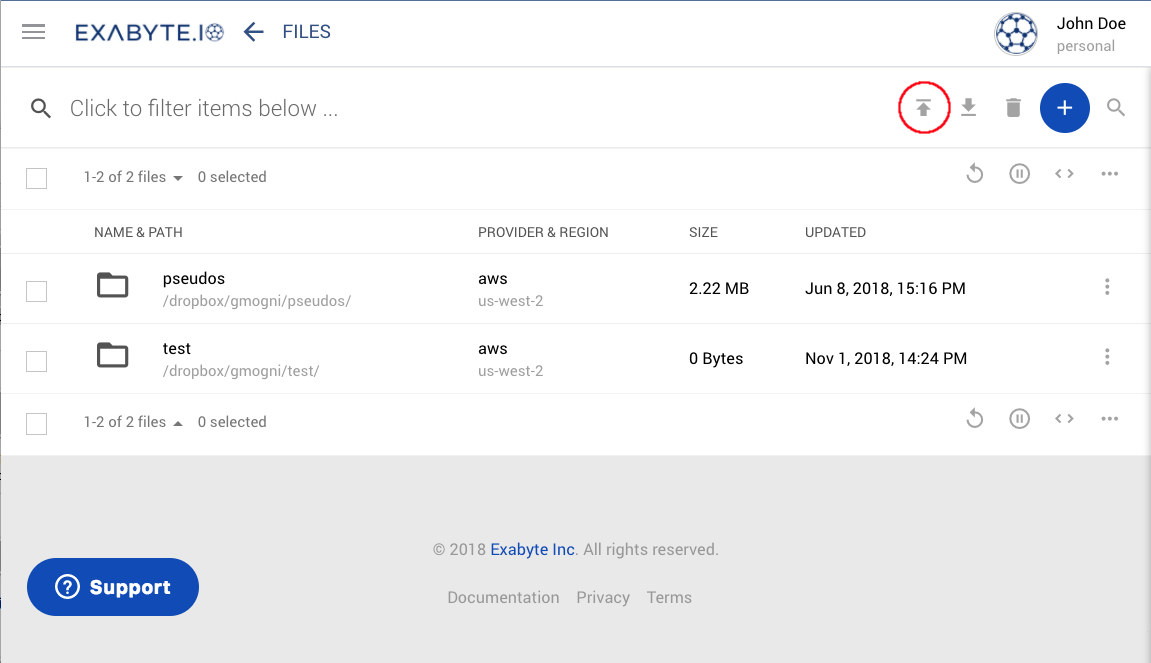
In order to upload data for predictions, we first click the Dropbox button in the left sidebar.
This will bring us to the Dropbox Page. We can then click the "Upload" button, circled
below:

Then, when the browser's upload window appears, we navigate to where we downloaded the file in section 1, and select it for upload. If the upload was successful, the file will then be visible in the dropbox.
3. Create the ML Job
Next, we can create a new job by selecting the Create Job button in the left sidebar. This
will bring us to a new job on the Job Designer page.
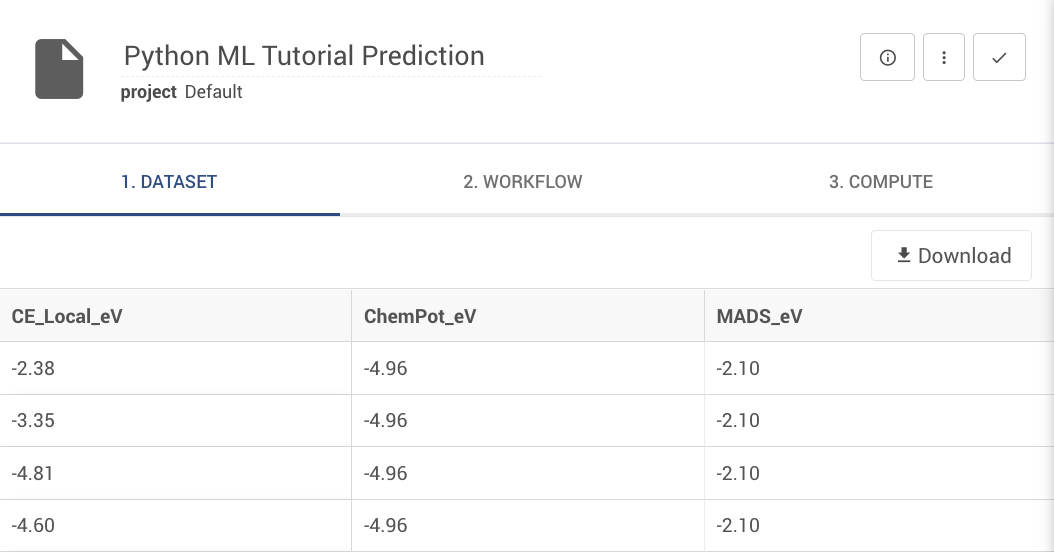
First, we will give the job a friendly name, such as "Python ML Tutorial Prediction" (see below). Then, we will click the Actions Button (the three vertical dots in the upper-right of the job designer), and choose "Select Workflow."

This will bring up the Select Workflow dialogue. We then search for "workflow:pyml_predict" and click on it to bring it into the job.
A diagram and detailed description of this workflow can be found here
4. Select the Dataset
The job designer changes now that our ML Predict workflow is selected. The "Materials" tab has now been replaced with a "Dataset" tab. Just as the "Materials" tab shows a preview of the materials the job will use, the "Dataset" tab shows a preview of the dataset once it is selected.
To select a dataset, click the Actions Button (the three vertical dots in the upper-right of the job designer) and choose "Select Dataset." This will bring up a files explorer containing all files presently on the dropbox. Choose the training set we uploaded earlier, "data_to_predict_with.csv."

A preview of the data then appears on the dataset tab, indicating that the data has successfully been loaded.
4. Inspect the ML Workflow
We now have our ML workflow selected and our dataset has been supplied. Select the Workflows Tab, and we can see our predict workflow.
We can see two subworkflows available: Set Up the Job
and Machine Learning.
The Set Up the Job subworkflow contains instructions to copy in the trained model as well as the data we have selected.
A Word of Caution
The Set Up the Job subworkflow has been automatically configured during the training process, and is not
intended for modification by the user. Changing it can render the predict workflow inoperable, and can lead to
inaccurate prediction results. Do not modify the Set Up the Job subworkflow.
The Machine Learning subworkflow contains the individual steps of the trained model we created previously.
There is no further configuration required: the workflow is already trained, and the prediction job is ready to submit.
6. Submit the Job
Click the check-mark in the upper right of the job designer, in the Header Menu to save the job. We now return to the job explorer page with the job in a pre-submission status.
We can now run the job and wait for it to complete.
7. Analyze the Prediction Results
After a few minutes, the job will complete. We can then visit the job's results tab,
where we will see a CSV preview of a file called predictions.csv. These are the row-by-row predictions generated by
the model. Under the hood, this file is generated inside the Model Train and Predict unit.
Animation
This tutorial is demonstrated in the following animation: