Increase Storage Quota
Warning: content with restricted access
All the information contained under the present documentation page is only relevant for Account Owners or Administrators, since only they have sufficient rights to view the content exposed herein and make the appropriate changes. We remind the reader that a user is always the Owner and full administrator of his own personal Account.
This page explains how to request an increase to the Account's Storage Quota on the available supercomputing clusters, in addition to the storage space already provided under the account's current service level. This action can be performed from the following four alternative locations across the platform interface:
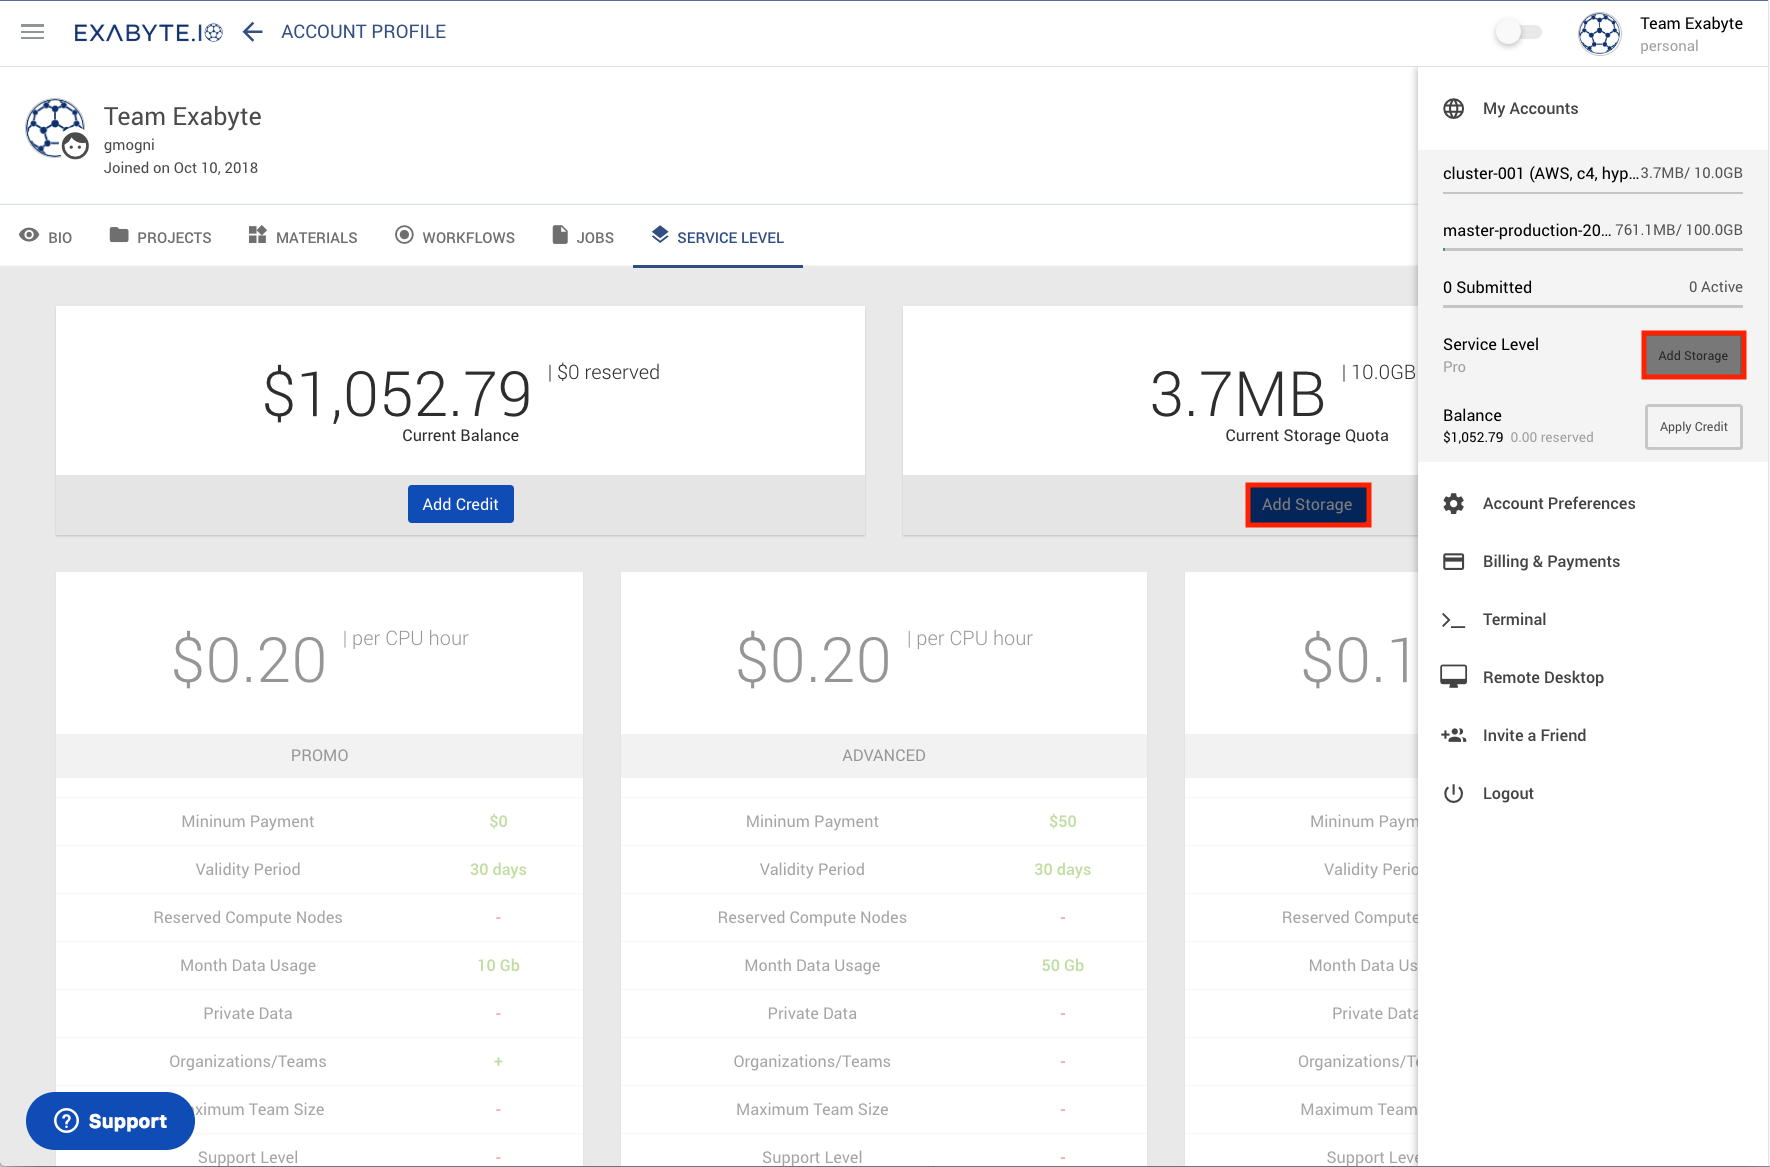
In the former two cases, the increase in Storage Quota can be executed through either of the corresponding Add Storage buttons, located within the broader User Interface as highlighted in red in the image below:

In the latter two cases on the other hand, the same action can be performed through the corresponding button at the top-right corner of the relevant quota information panel, as displayed in the example image below:

Increase Quota Dialog
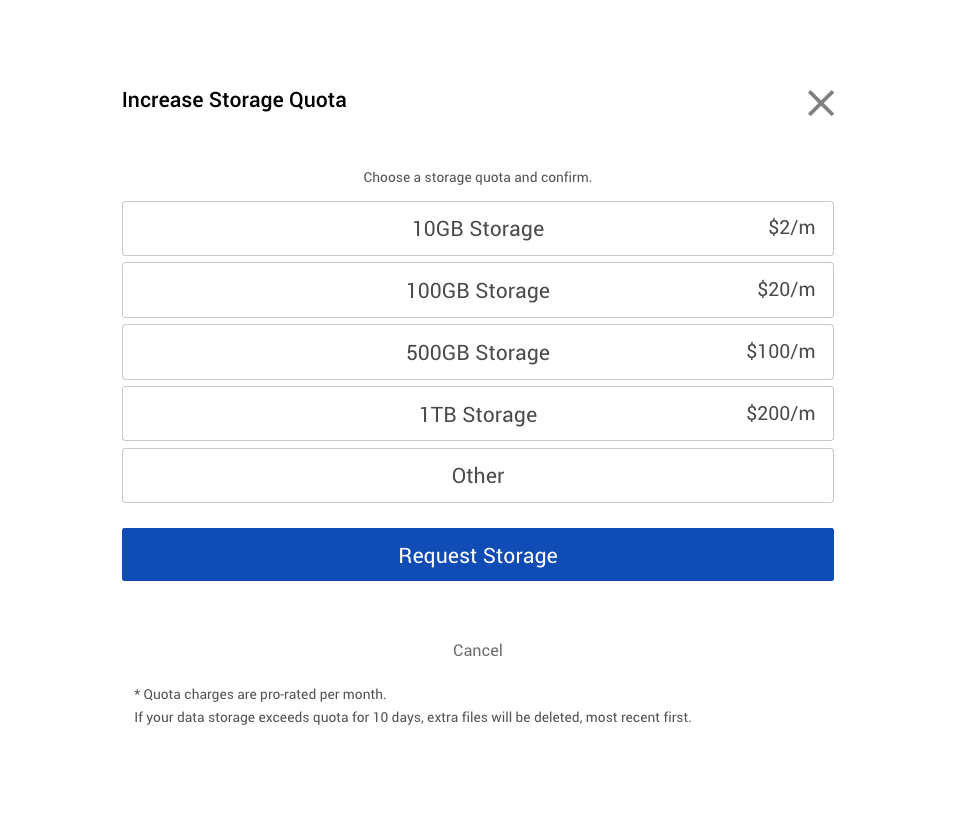
Once any of the above-mentioned buttons have been clicked upon, the user will be greeted with the following "Increase Storage Quota" screen asking him to select the desired amount of storage space to be added to the account quota from a predefined set of options (10, 100, 500 GigaBytes, or 1 TeraByte). Next to each entry in this list of options, the associated price that will be charged on a monthly basis to the account balance is indicated.
Custom Amounts
Alternatively, a custom amount of storage space can be entered under the Other option of the dialog (in GigaBytes), and the associated monthly price will appear directly underneath.

Note: sufficient account balance
The user should ensure that sufficient funds are present in the Account Balance to be able to afford the desired increase in Storage Space for the account under consideration.
Warning: risk of data loss in case of excessive storage consumption
If the account's consumed data storage exceeds the purchased storage quota for 10 days consecutively, the files in excess will be deleted from the supercomputing clusters, most recent files first.
Finalize the "Increase Storage Quota" Operation
Once the user has made the desired choice from the above-mentioned list of options under the "Increase Storage Quota" screen, the bottom Request Storage button should be pressed to confirm and finalize the storage increase operation. We will send an email within 24 hours confirming the storage quota upgrade. The user should login again to the corresponding account to verify the new storage quota.
Alternatively, to cancel the operation and revert to the previous screen, the neighbouring Cancel button (or the X button at the top-right corner of the screen) should be clicked upon.