Machine Learning: Train a Random Forest for Classification
This tutorial demonstrates how to train a Random Forest 1 classifier using Scikit-Learn. 2
1. Acquire Training Data
The data we use in this example comes from the QSAR group's biodegredation database, as hosted on Kaggle. 3
The dataset consists of 41 unique descriptors of each molecule, and the goal of the problem is to predict whether the molecule is biodegredable or not.
For convenience (and to ensure the ROC curves are predicted on the correct side of the diagonal), we have gently pre-processed the dataset to encode its class labels as 0 and 1 (previously, they were 1 and 2). This is temporary - the May update to the platform will automaticlaly encode class labels as 0 and 1, and will automatically un-transform them to their original labels (e.g. 1 and 2, in this case).
Please download the dataset here.
For the purposes of this tutorial, we will name this dataset "data_to_train_with.csv" from this point onward.
2. Upload the Training Data
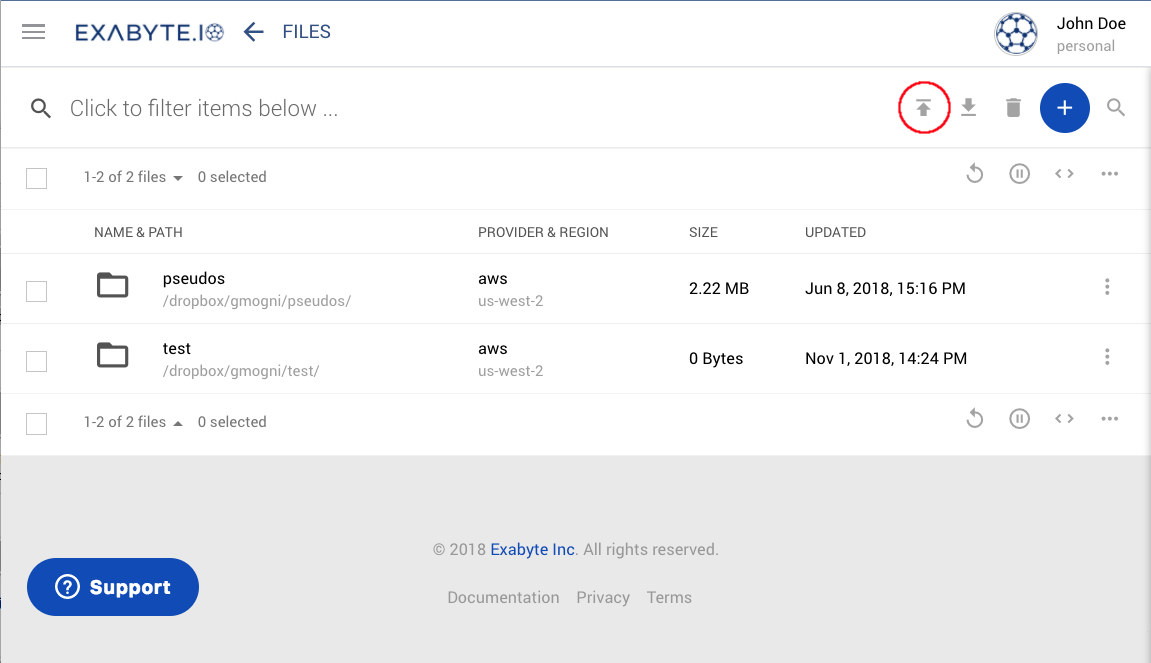
In order to upload training data, we first click the Dropbox button in the left sidebar.
This will bring us to the Dropbox Page. We can then click the "Upload" button, circled
below:

Then, when the browser's upload window appears, we navigate to where we downloaded the file in section 1, and select it for upload. If the upload was successful, the file will then be visible in the dropbox.
3. Copy the "Python ML Train Classification" Workflow from the Workflow Bank
Next, we select theBank Worfklows button in the left sidebar, which brings us to
the Bank Workflows Page. We then search for the "Python ML Train Classification" workflow owned
by the "Curators" account, and copy it to our account.
A diagram and detailed description of this workflow can be found here.
4. Create the ML Job
Next, we can create a new job by selecting the Create Job button in the left sidebar. This
will bring us to a new job on the Job Designer page.
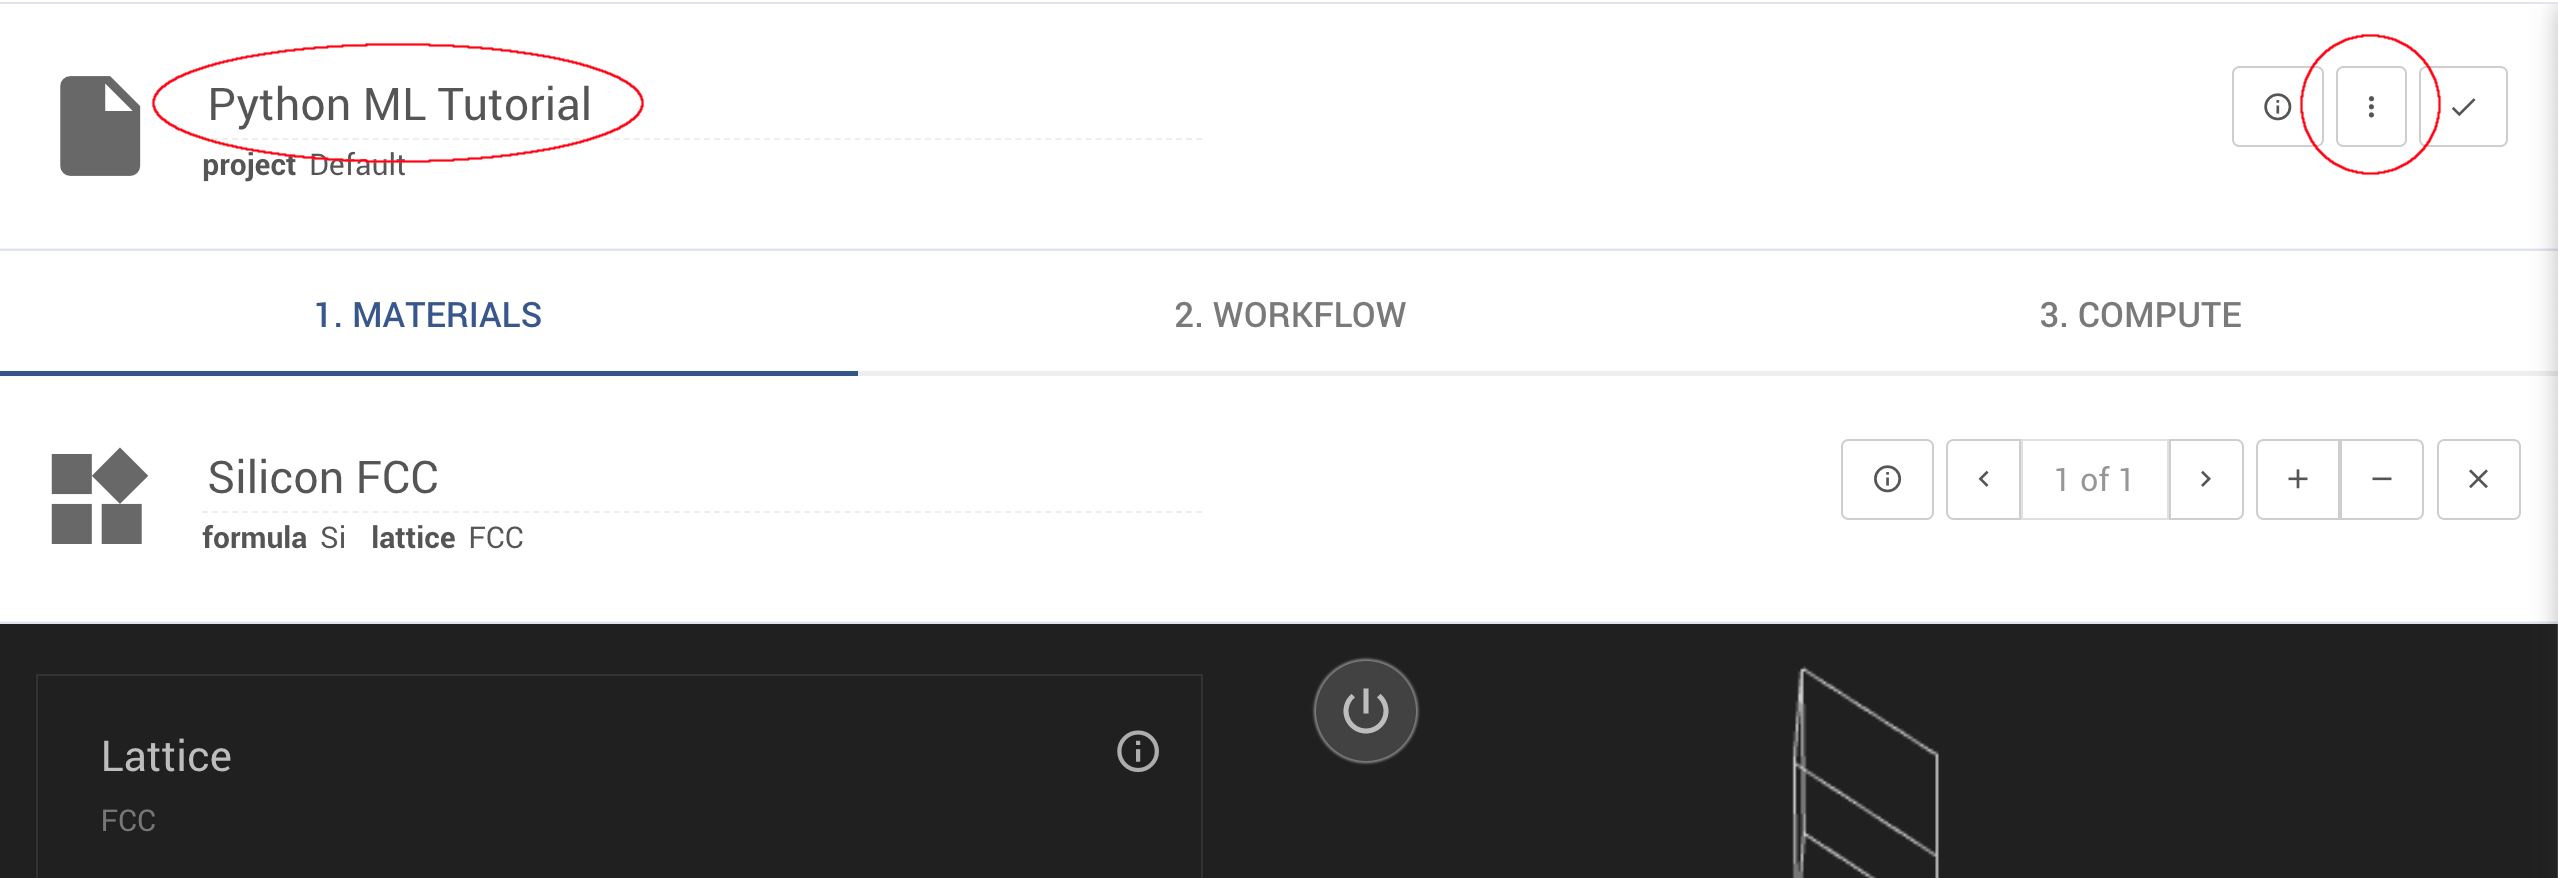
First, we will give the job a friendly name, such as "Python ML Tutorial" (see below). Then, we will click the Actions Button (the three vertical dots in the upper-right of the job designer), and choose "Select Workflow."

This will bring up the Select Workflow dialogue. We then search for "Python ML Train Classification" and select it.
5. Select the Dataset
The job designer changes now that our ML Training workflow is selected. The "Materials" tab has now been replaced with a "Dataset" tab. Just as the "Materials" tab shows a preview of the materials the job will use, the "Dataset" tab shows a preview of the dataset once it is selected.

To select a dataset, click the Actions Button (the three vertical dots in the upper-right of the job designer) and choose "Select Dataset." This will bring up a files explorer containing all files presently on the dropbox. Choose the training set we uploaded earlier, "data_to_train_with.csv."
A preview of the data then appears on the dataset tab, indicating that the data has successfully been loaded.
6. Configure the Workflow
We have now chosen our ML workflow and training set. Select the Workflows Tab, and we can see our training workflow.
We can see two subworkflows available: Set Up the Job
and Machine Learning.
The Set Up the Job subworkflow contains instructions to copy in the training data.
A Word of Caution
The Set Up the Job subworkflow is automatically configured during the training process. Modifying it can disrupt
creation of the Predict workflow, leading to inaccurate results, or a failure to generate a predict workflow.
Select the Machine Learning subworkflow by clicking on it. The following workflow units should now be visible:
Setup Packages and Variables- Configures the job and downloads all required packages withpipData Input- Reads the training data from diskTrain Test Split- Splits the data into a training set and a testing setData Standardize- Scales the data such that it has mean 0 and standard deviation 1Model Train and Predict- Handles model training, and predictionROC Curve Plot- Draws a plot of the Receiver Operator Characteristic (ROC) curve 4
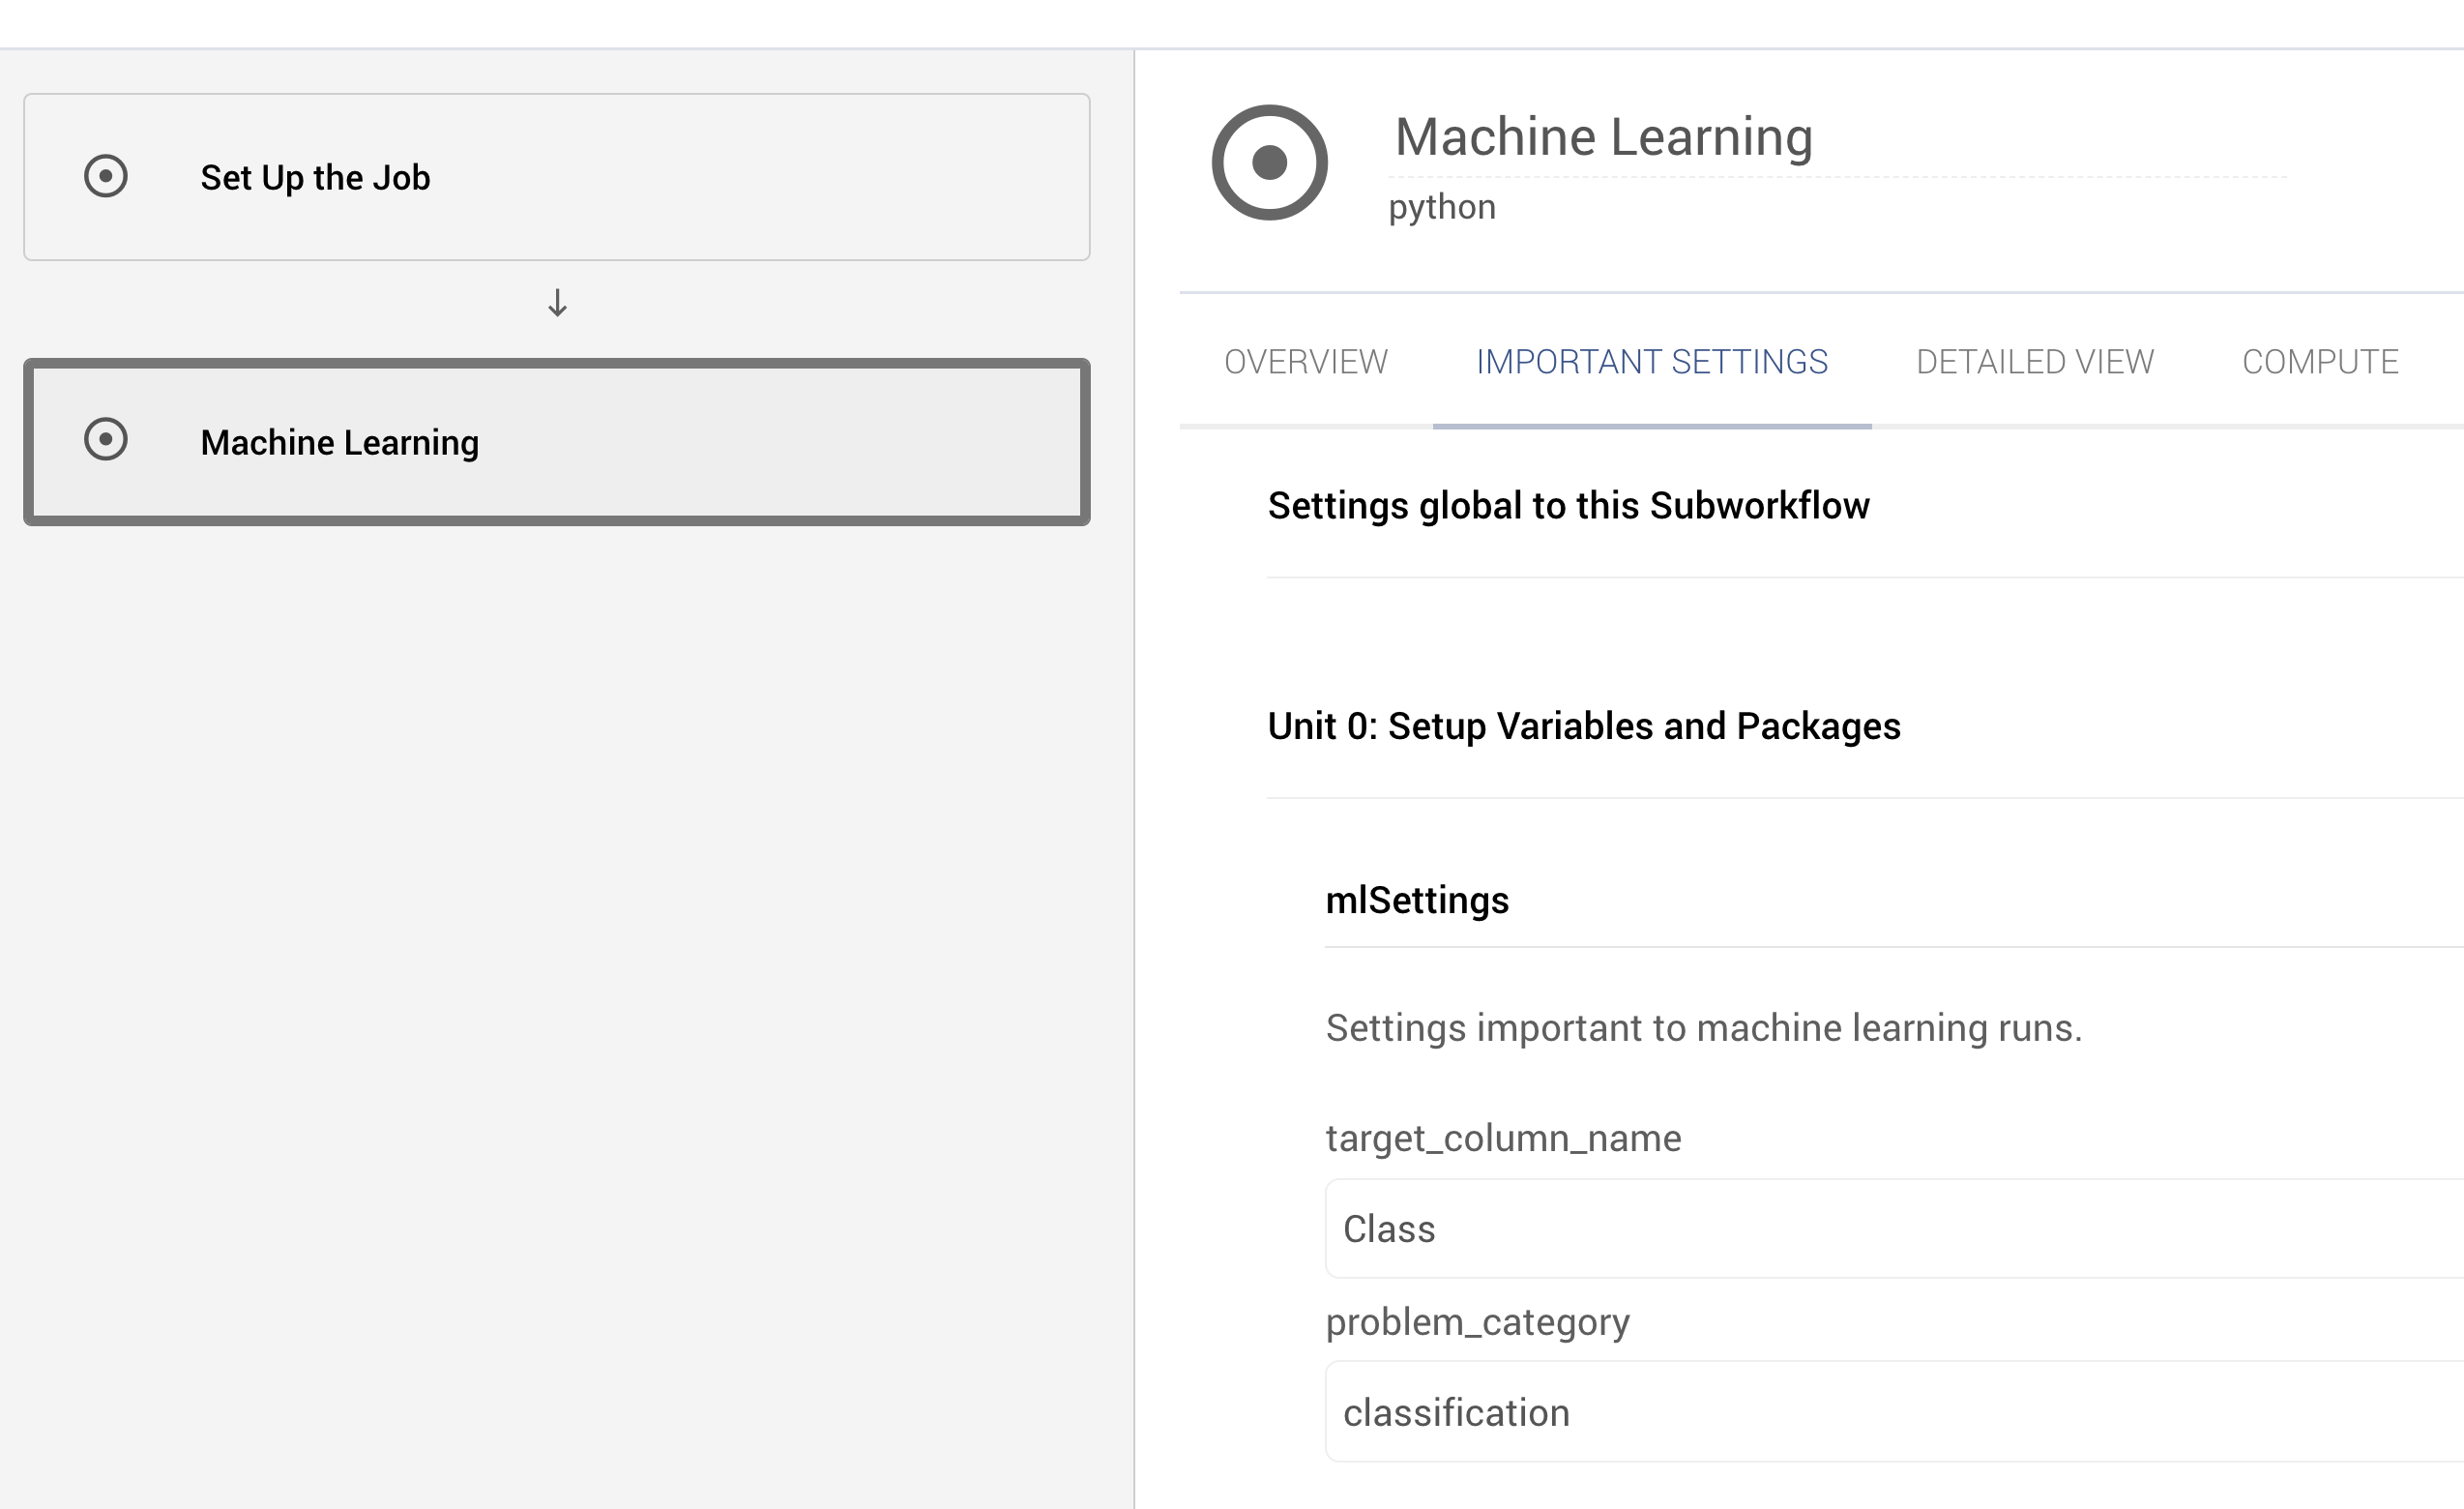
We will begin by configuring our Machine Learning subworkflow. To begin, select the "Important Settings" portion of the
workflow editor. Then, set target_column_name to "Class" to define the target column of the training set. Then,
set the problem_category to be classification.

The workflow has now been configured, and we are ready to train.
7. Submit the Job
Click the check-mark in the upper right of the job designer, in the Header Menu to save the job. We now return to the job explorer page with the job in a pre-submission status

We can now run the job and wait for it to complete.
8. Analyze the Training Results
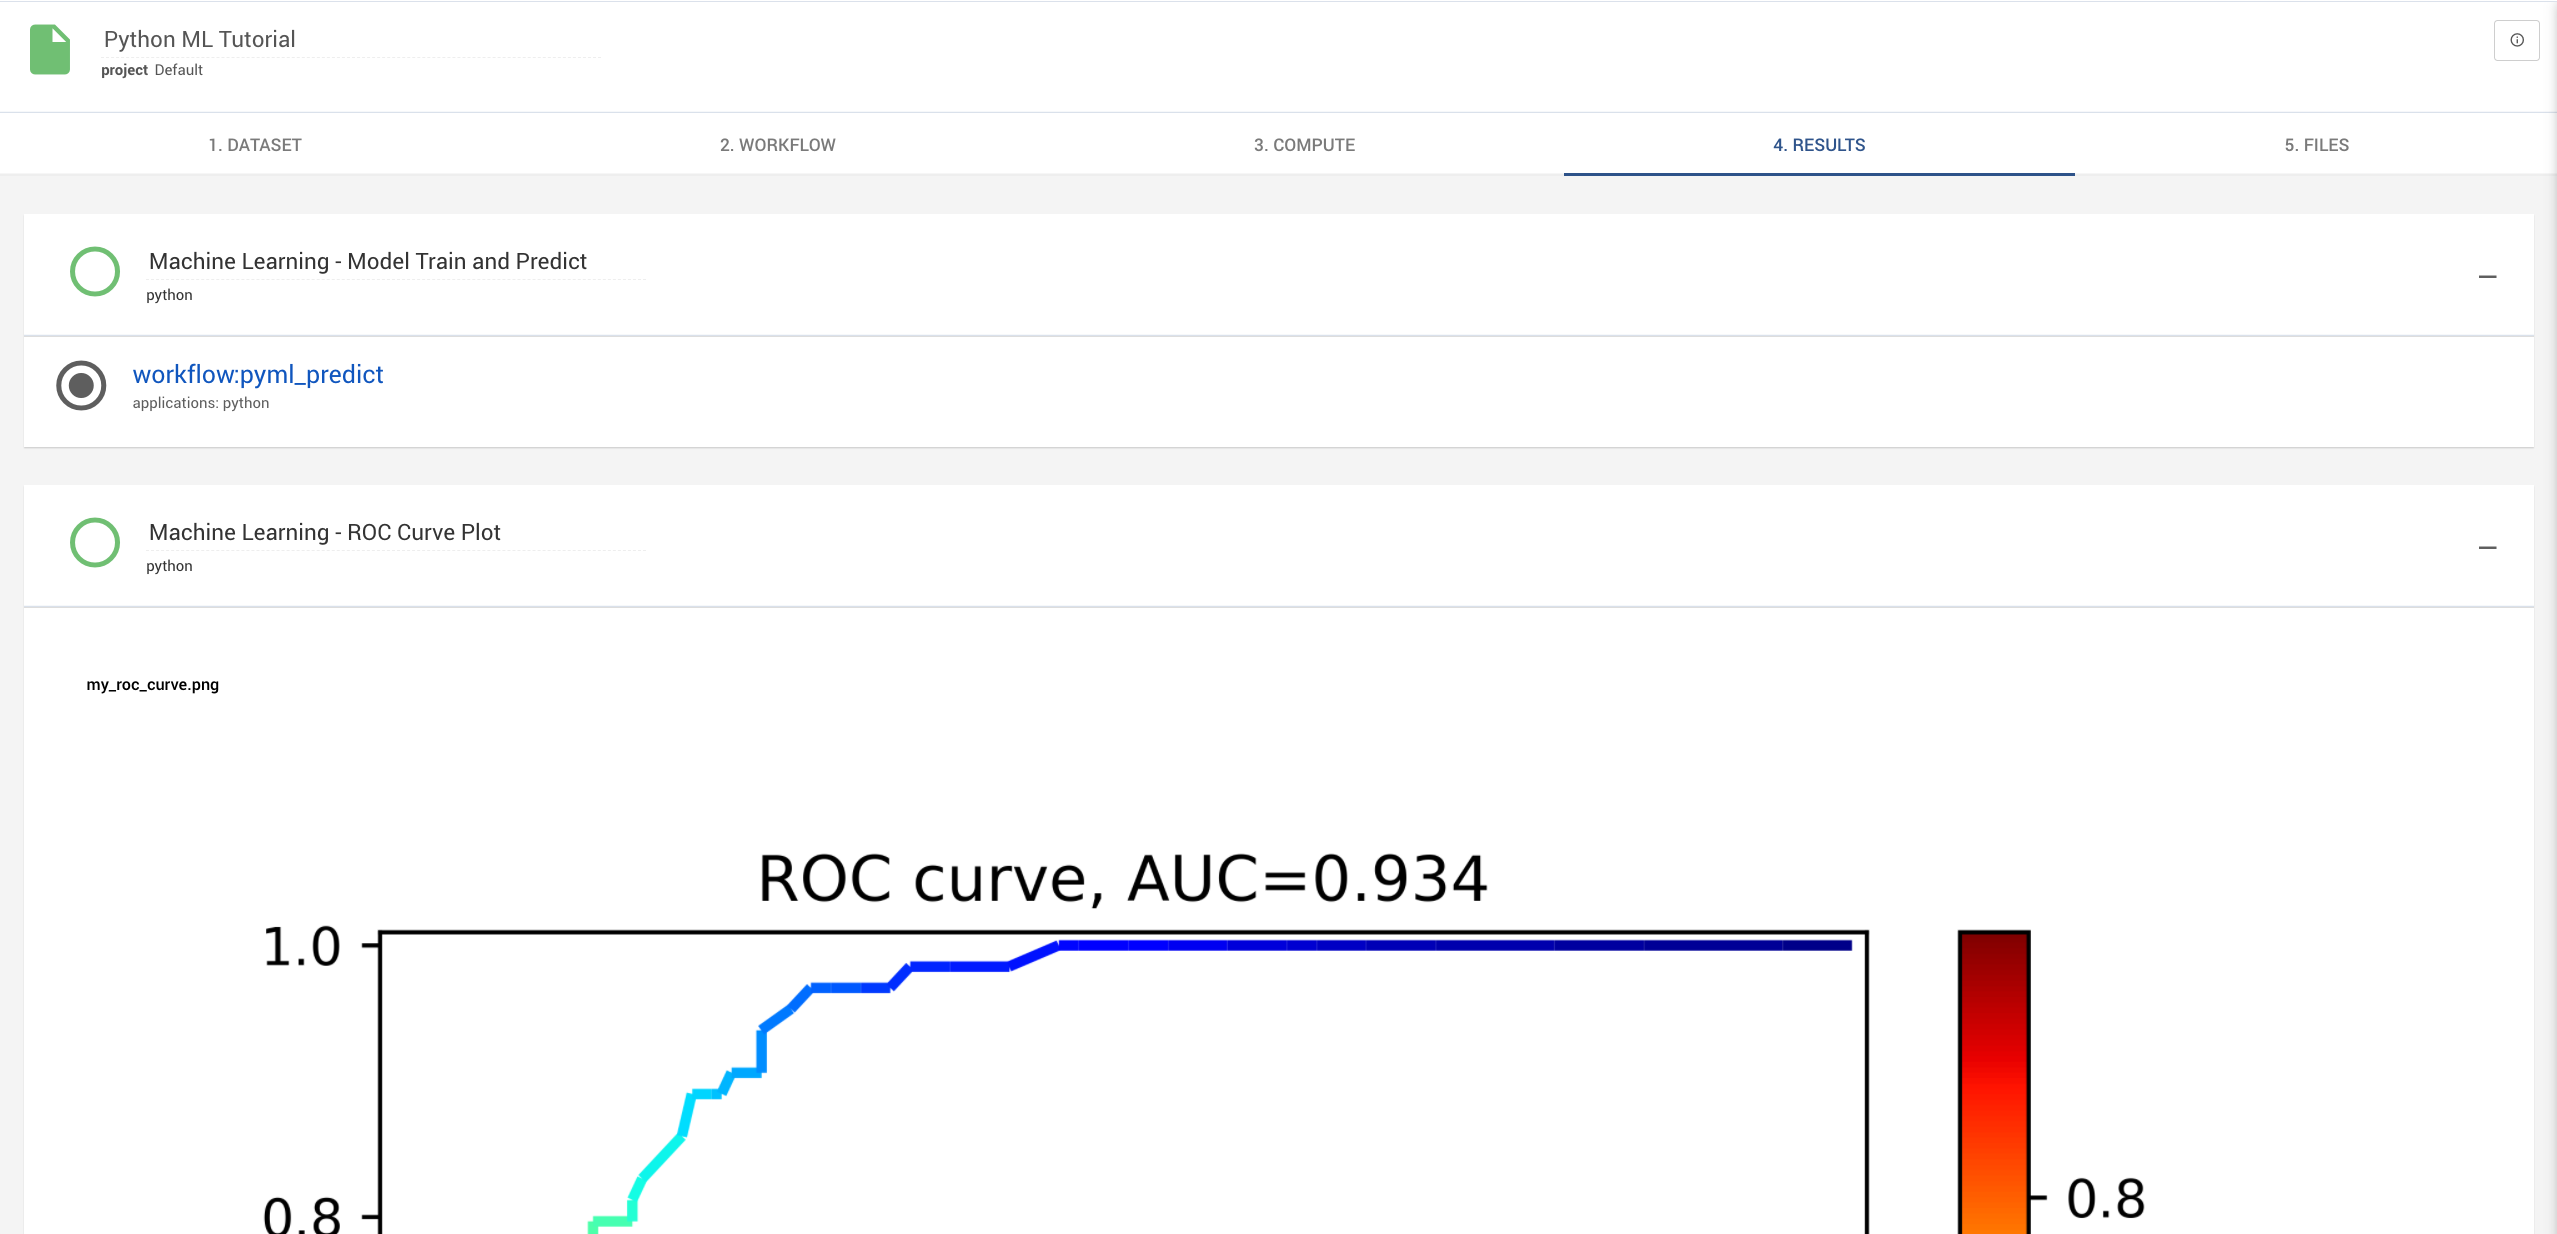
After a few minutes, the job will complete. We can then visit the job's results tab,
where we will see that two properties have been calculated. The first, Machine Learning - Model Train and Predict is
the predict workflow that was generated by the machine learning job. The predict workflow can be used to leverage the
trained model for additional predictions on new data.
The second result visible is Machine Learning - ROC Curve Plot, which contains the ROC curve we calculated to assess
the model.

Animation
This tutorial is demonstrated in the following animation: