What is Jobs Designer?
Our platform provides a convenient interface for conceiving, editing and executing simulation Jobs We refer to this interface as the Jobs Designer, and we reviewed it in detail in this section of documentation.
Navigating to Jobs Designer
From project page
The Jobs Designer interface can be opened by creating a new Job, starting from the Project Page for the project under which the user wishes to save the new Job.
From left-hand sidebar
Alternatively, it can be opened directly from the left-hand sidebar menu. In this case the new job will be associated with the default project. One may review this page for instructions on how this default choice can be changed in the Project Explorer.
Open jobs in "pre-submission" status
Any entry listed in Jobs Explorer which has a "Pre-submission" status can be opened in Designer. This is because jobs not submitted for computation yet can be fully modified by the user (thus no limitations on edits such as those imposed by the Viewer).
Components of the Interface
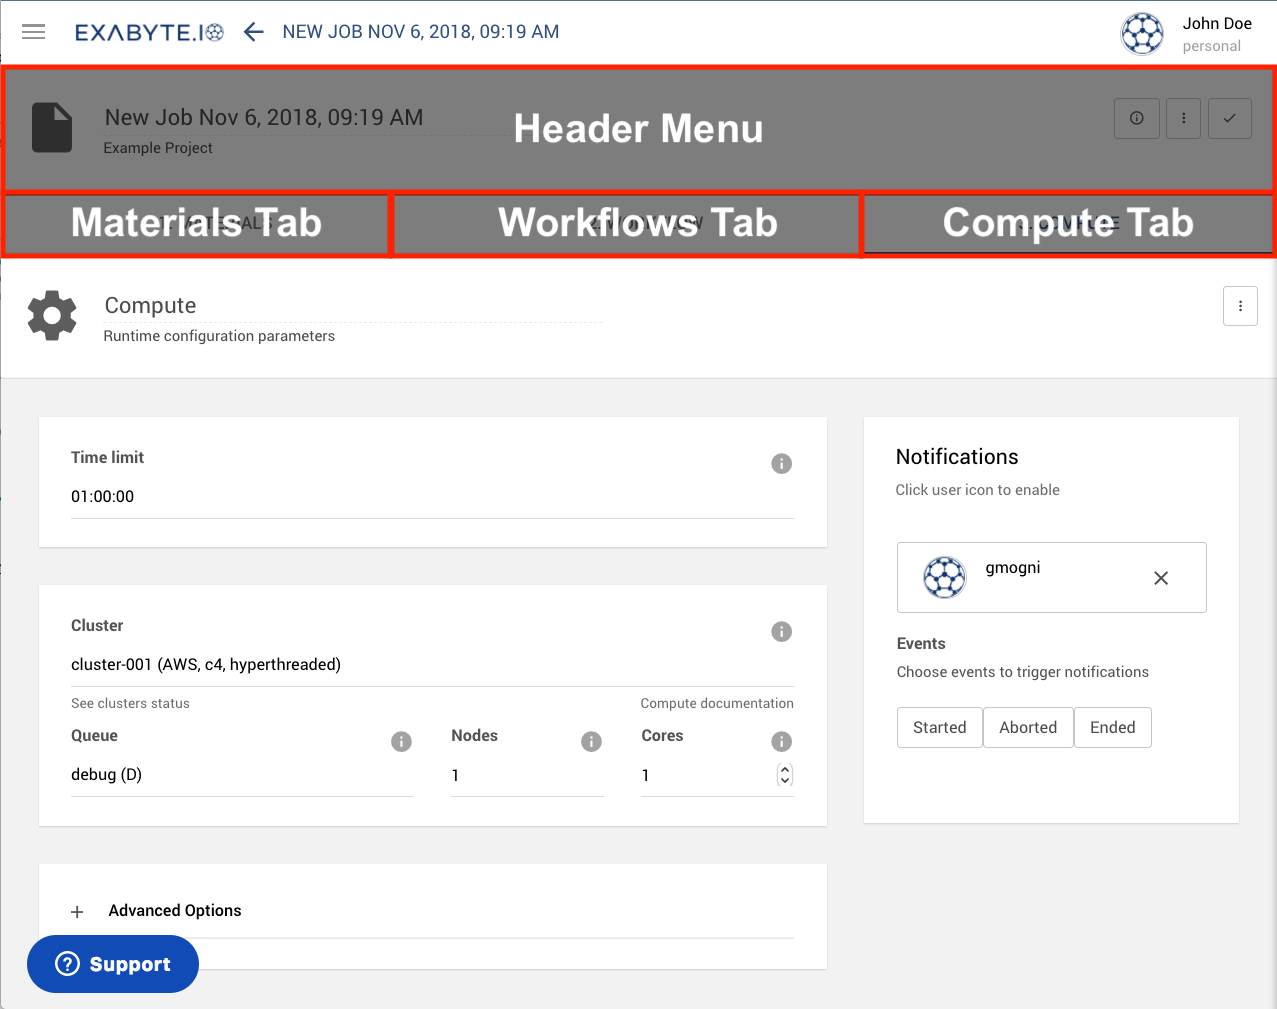
The creation of new simulation Jobs via Designer proceeds through three main steps, namely the definition of the Materials to be investigated (1), the type of simulation Workflow to be applied upon them (2), and finally of the computational resources to be allocated for these calculations (3).
These three steps are each formulated under the corresponding tab, as highlighted in the picture below. This image also shows the location of the header menu located at the top of the page.
Click on each component panel within the image to access the corresponding documentation section, or alternatively refer to the links listed towards the end of the present page.
Header Menu
The components of the header menu are reviewed in this part of the documentation.
Materials Tab
The explanation for the Materials Tab is offered in this page.
Workflow Tab
The Workflow tab is the object of a separate discussion, which can be found here.
Compute Tab
The Compute tab is documented in this section.