Save
Save function of Materials Designer allows user to save any modifications to the materials in the account-owned collection.
Select "Save" Option
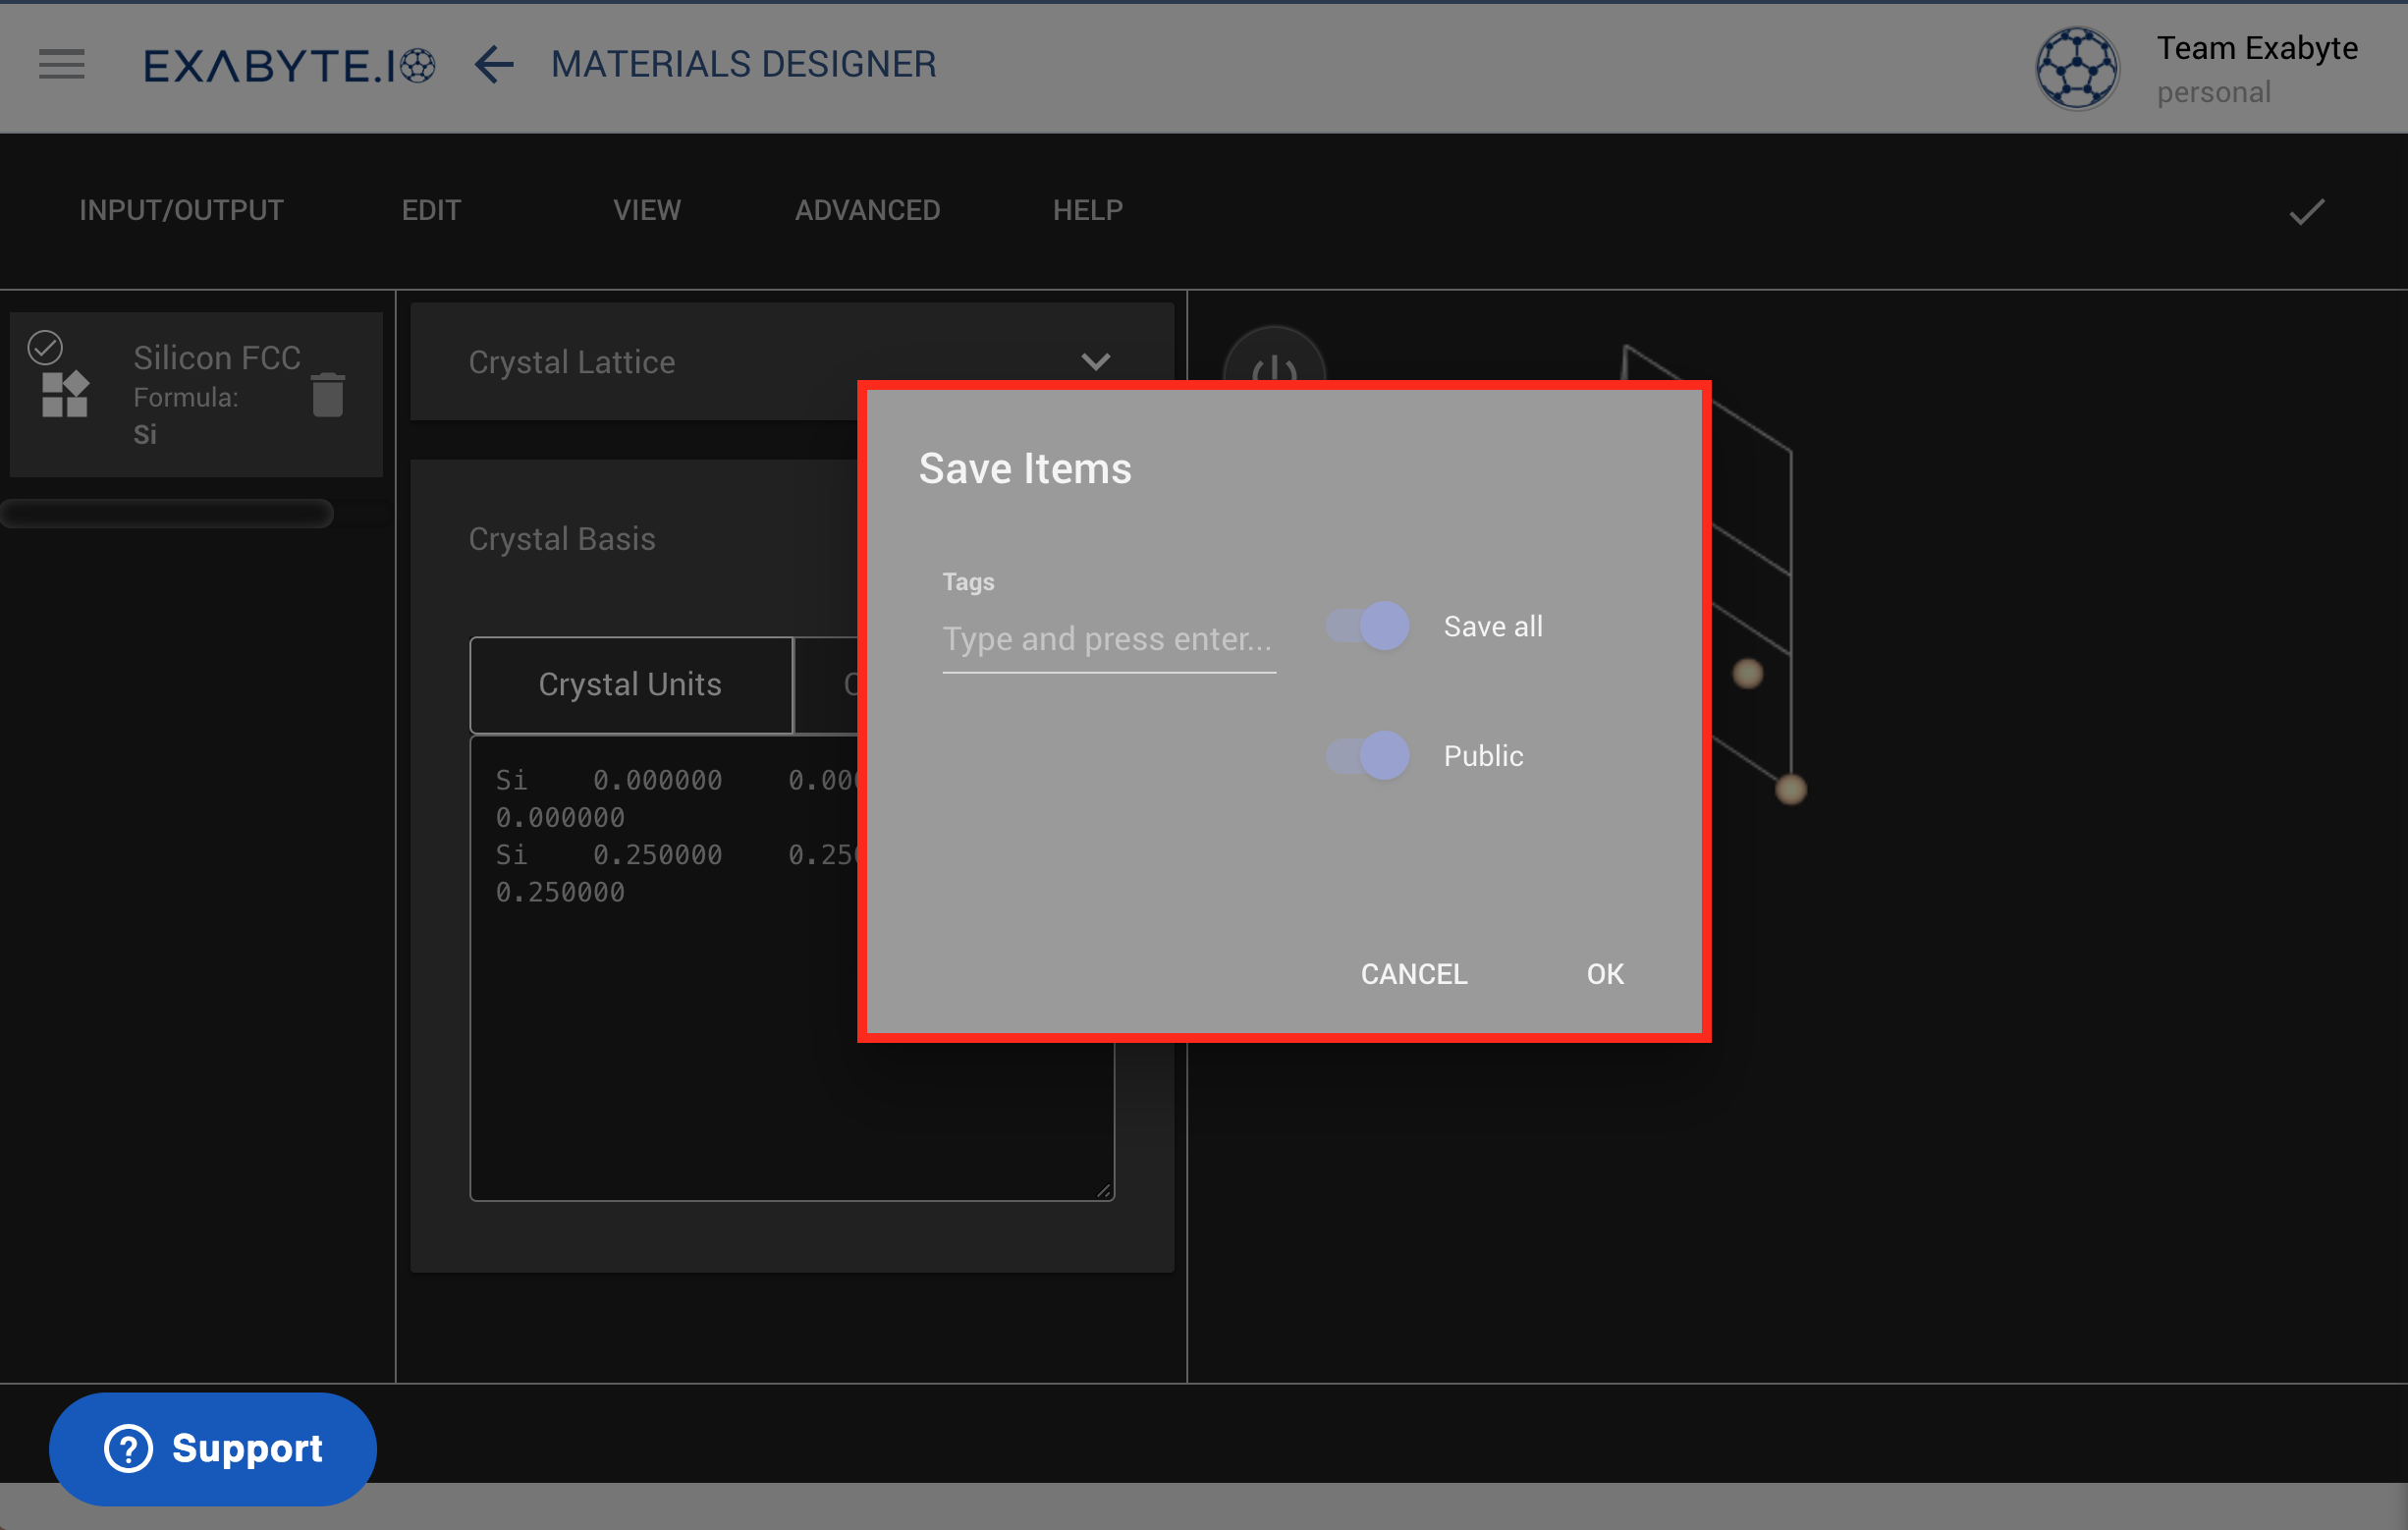
In order to save structures following any changes made, click on the third Save option in the Input/Output menu. This will open the following "Save Items" dialog:

The Save Dialog
The Save Dialog allows users to set additional information about the materials.
Tags
Here the user can add text tags to the crystal structure that needs to be saved. This might be helpful for for later retrieval of the structure when performing general searches. Once each tag is typed in the corresponding text field, the Enter key should be pressed to record it. The corresponding badge will appear under the text field.
Save all
In this dialog the user can also choose, through the top slider, whether to save just the currently-selected structure in the items list sidebar (slider to the left) or save all items simultaneously (slider to the right).
Public
In the lower slider, the user can adjust the access level for the materials to be saved (see the explanation of system-wide permission levels here).
Select Set
By clicking on this input field user can select the materials set in which the created/modified materials should be saved.
Execute Save
Press the OK button to save the desired materials together with any tags added to them, or the Cancel button to revert back to the previous screen.
Animation
The steps above are summarized in the animation below. Here, we first select the second material in the sidebar items list, and we change one of its atomic coordinates. Next, we open the "Save Items" dialog and add new tags, pressing the Enter key after each tag is typed. We further choose to save this material only ("Save Current"), and choose to save it to our own private materials collection as opposed to the public collection (Public = false).